Subscriber and Device Management
Subscriber management includes workflows associated with provisioning new subscribers, removing existing subscribers, and associating subscribers with slices.
Note
This section refers to a fully installed ROC GUI, properly secured and with Enterprises, Connectivity Services and Sites already configured by a ROC Administrator. The examples shown below are taken from an example configuration shipped with the ROC - the “MEGA Patch” (see Posting the mega-patch)
Provisioning a new Device
Before a Device can be granted connectivity service, it must first be provisioned. This step is normally performed by Aether Operations.
Each Device is assigned a PLMN and a set of security keys. Depending on the deployment scenario, these
keys might be shared by several Devices, or they might be unique to each Device. The allocation of PLMNs and
keys is currently performed manually by the Aether Operations team. This subscriber-related
detail is configured via the SIM Management application, simapp.
simapp.yaml needs to be adjusted to include the new Device IMSIs to the subscriber list. For example:
# simapp.yaml
# ...
simapp.yaml:
    info:
      version: 1.0.0
      description: SIMAPP initial local configuration
    logger:
      # network function
      APP:
        debugLevel: info
        ReportCaller: false
    configuration:
      provision-network-slice: false
      subscribers:
      - ueId-start: 123456789123458
        ueId-end: 123456789123458
        plmnId: 20893
        opc: 8e27b6af0e692e750f32667a3b14605d
        key: 8baf473f2f8fd09487cccbd7097c6862
        sequenceNumber: 16f3b3f70fc2
      - ueId-start: 123456789123460
        ueId-end: 123456789123465
        plmnId: 20893
        opc: 8e27b6af0e692e750f32667a3b14605d
        key: 8baf473f2f8fd09487cccbd7097c6862
        sequenceNumber: 16f3b3f70fc2
The simapp configurations for all deployments are stored in the aether-app-configs repository:
Production deployment:
apps/sd-core-4g/overlays/prd-acc-gcp1/values.yamlStaging deployment:
apps/sd-core-4g/overlays/stg-acc-aws/values.yaml
Fleet will automatically deploy changes to these files once they are merged.
Configure Connectivity Service for a new Device
To receive connectivity service, the following steps are necessary:
The Sim-Card for the Device must be created.
The Device must be created and associated with the Sim-Card.
The Device must be added to a Device-Group.
Create the Sim-Card
Note
If Simapp integration has been enabled on the site, then new Sim-Cards will automatically be added to the Site as the Aether staff provisions the SIM Cards. In that case, the Sim-Card object will already be present, and this section may be skipped.
Start by bringing up the Sim-Card list:
Click the add button to add a new Sim-Card:
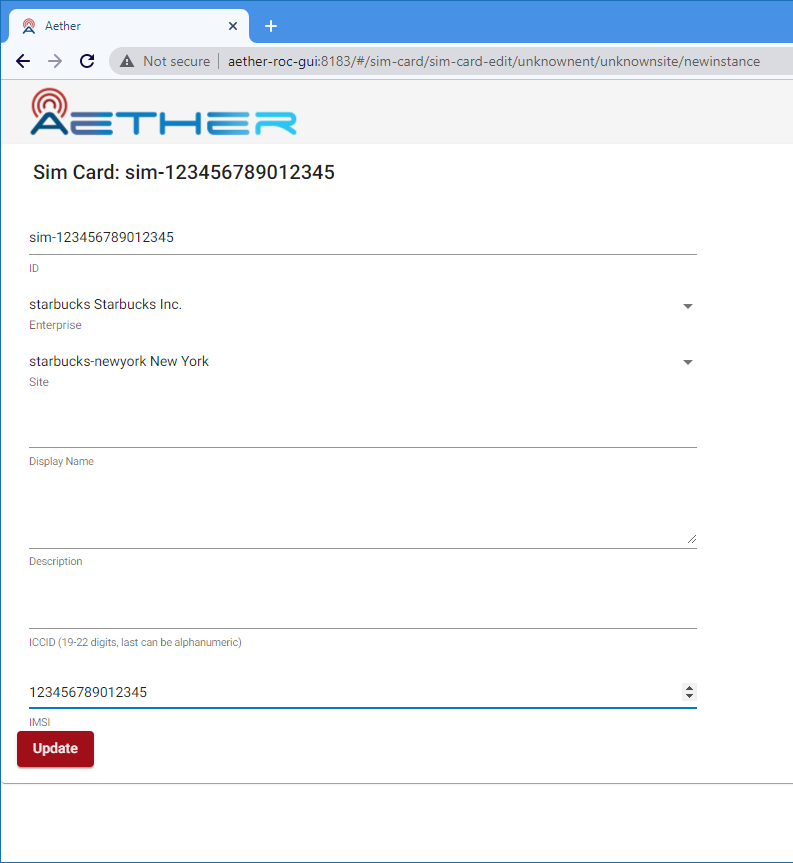
Select an Enterprise and Site where the Sim-Card will belong. Give the Sim-Card a unique ID. You must also set the IMSI for the Sim-Card, which should have been provided by Aether operations. All other fields, including the ICCID, are optional. Update and Commit the changes when you are finished.
Creating the Device
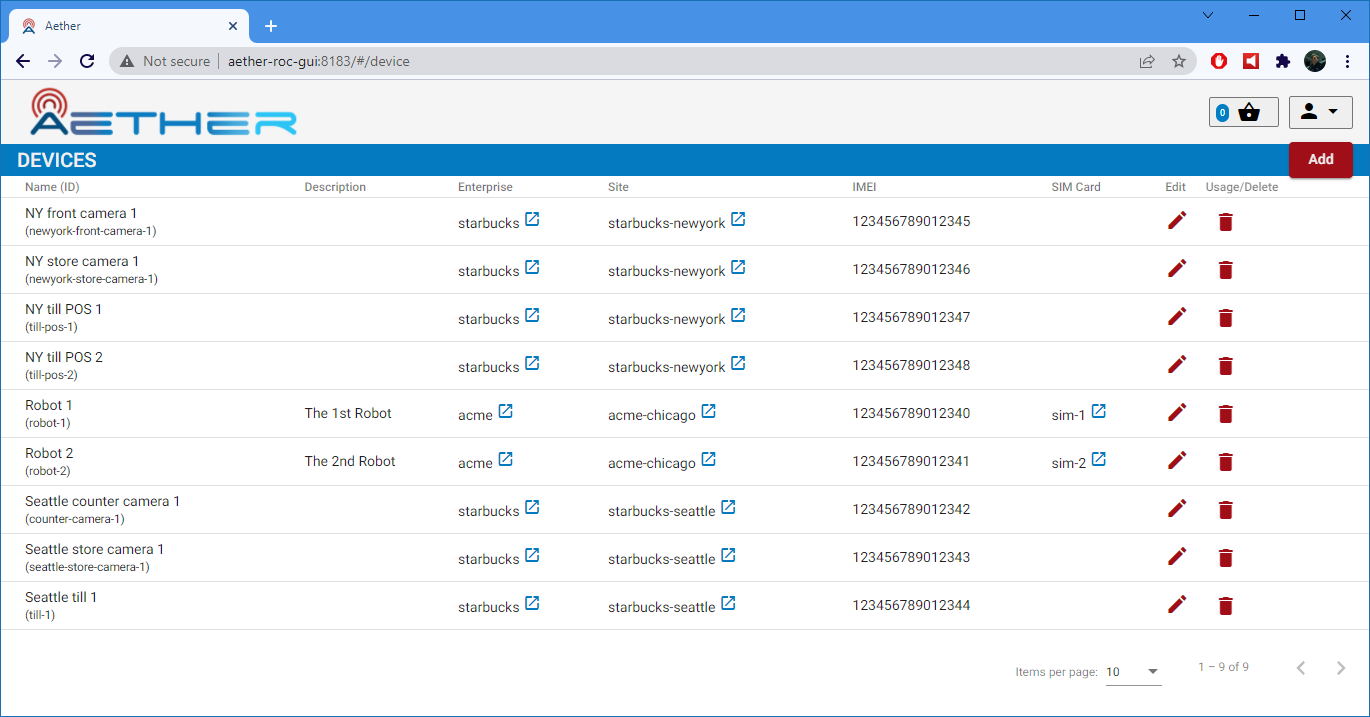
To create the Device, start by navigating to the Device list:
Click the add button to add a new Device:
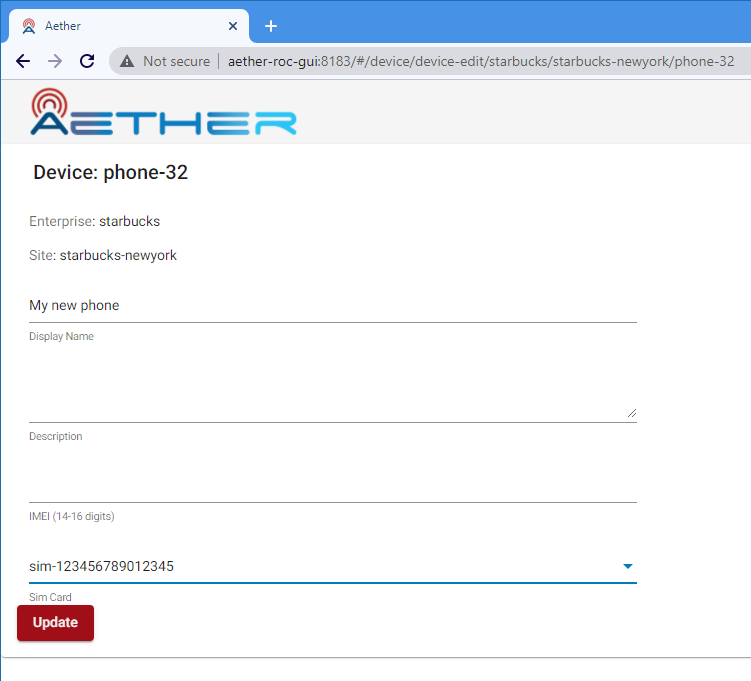
Select an Enterprise and Site where the Device will belong. Give the Device a unique ID and select a Sim-Card to associate with the Device. It is allowed to create the Device with no Sim-Card, in case you want to associate the Sim-Card at a later date. All other fields, including the IMEI, are optional. Update and Commit the changes when you are finished.
Adding the Device to the Device-Group
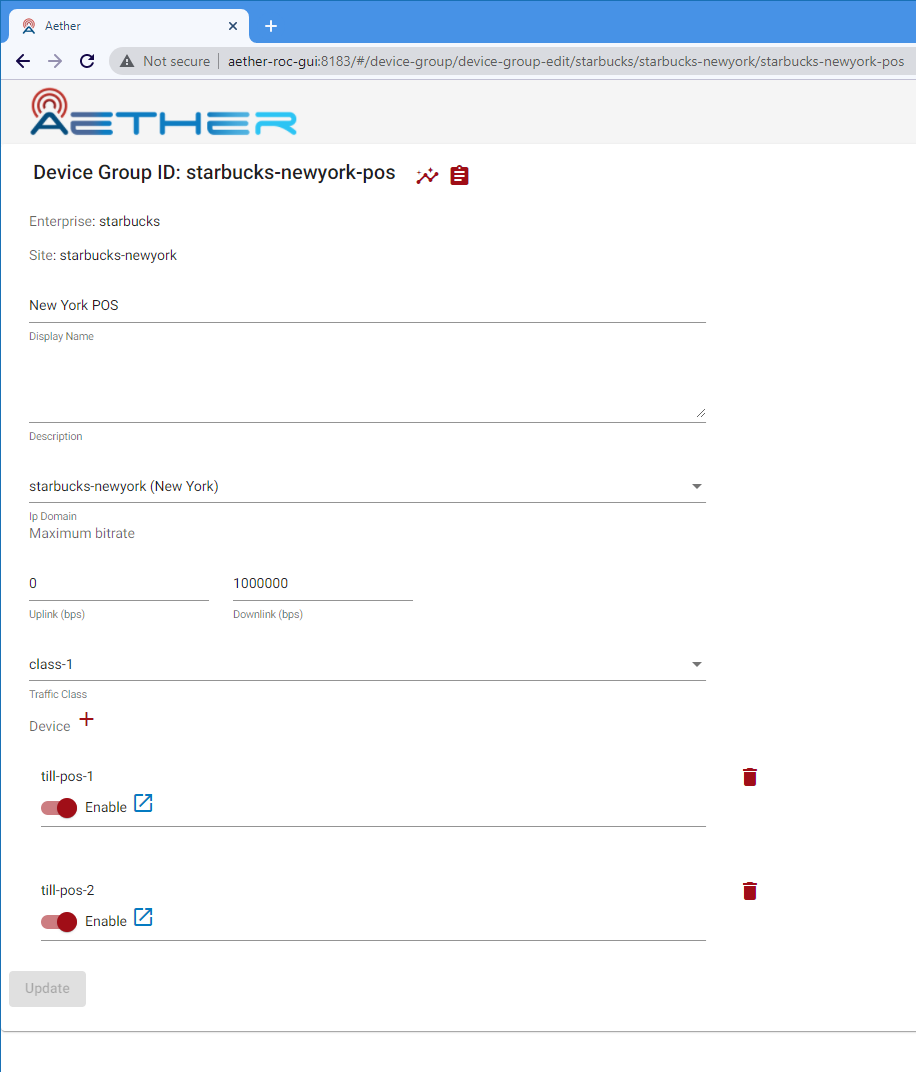
An Enterprise is typically organized into one or more Sites, each Site which may contain one or more DeviceGroups. Navigate to the appropriate DeviceGroup which is associated with the Site you wish to deploy on, and add the Device’s IMSI to the DeviceGroup.
The Site details can be seen by navigating to the Site list view.
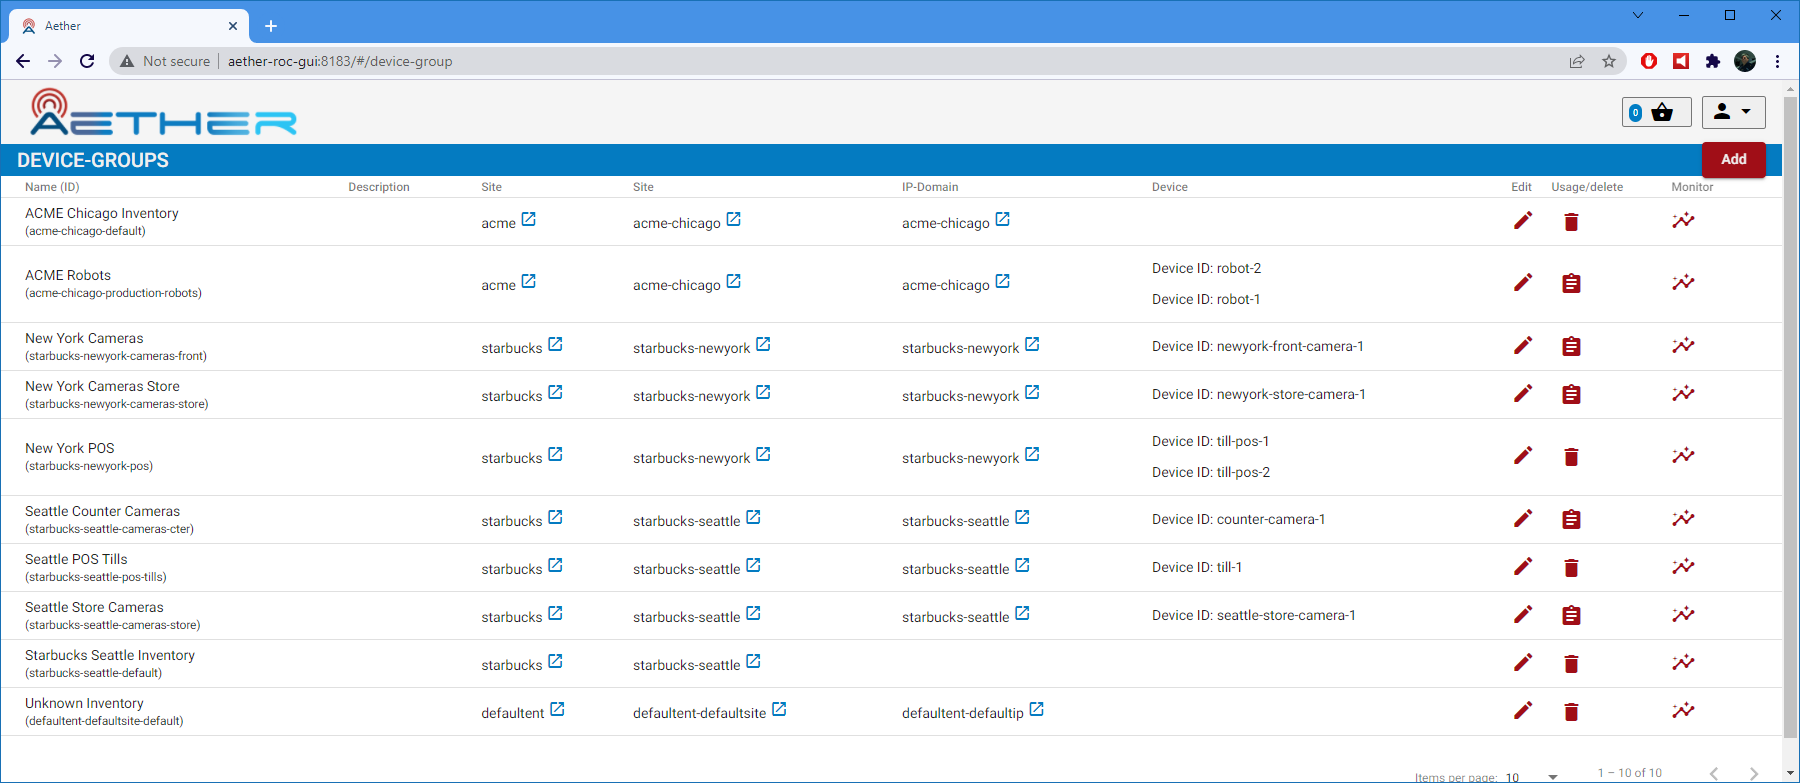
In the ROC GUI, navigate to the Device Groups list view, to see the list of Device Groups and their association to Sites.
In the Device-Group New York POS example above there are two devices listed, till-pos-1 and till-pos-2.
Note
A Device may participate in at most one DeviceGroup, and that DeviceGroup may participate in at most one Slice.
Editing
Edit the DeviceGroup by clicking on the Edit icon, and in the List page, adjust an existing Device ID range or create a new range (by clicking on the + icon).
The Device-Group page includes a list of each device that comprises the group. Each one may be individually enabled or disabled. Enable or disable is intended to temporarily limit connectivity; the device can also be permanently deleted. To add a device to the group, click the plus symbol next to the device, and then select an available device.
Note
While you are allowed to add a device to multiple device groups, this is not recommended.
When the entries on the DeviceGroup edit page are valid the Update will become available
Click this to add the changes to the Basket of configuration changes
Observe that the Basket icon (2nd icon from top right) displays the number of changes
Note
The changes are not committed to aether-config until the Basket is committed. This allows several changes to be gathered together in one transaction and checked before committing.
Remove Connectivity Service from an existing Device
Using the ROC GUI, navigate to the DeviceGroup that contains the Device, then remove that Device from the list.
Once finished editing, proceed to the Basket View, inspect the changes and Commit.
Note
The Device may continue to have connectivity until its next detach/attach cycle.
Create a new DeviceGroup
DeviceGroups allow Devices to be grouped and configured together. Each site comes preconfigured with a default DeviceGroup, but additional DeviceGroups may be created. For example, placing all IP Cameras in an “my-site-ip-cameras” DeviceGroup would allow you to group IP Cameras together.
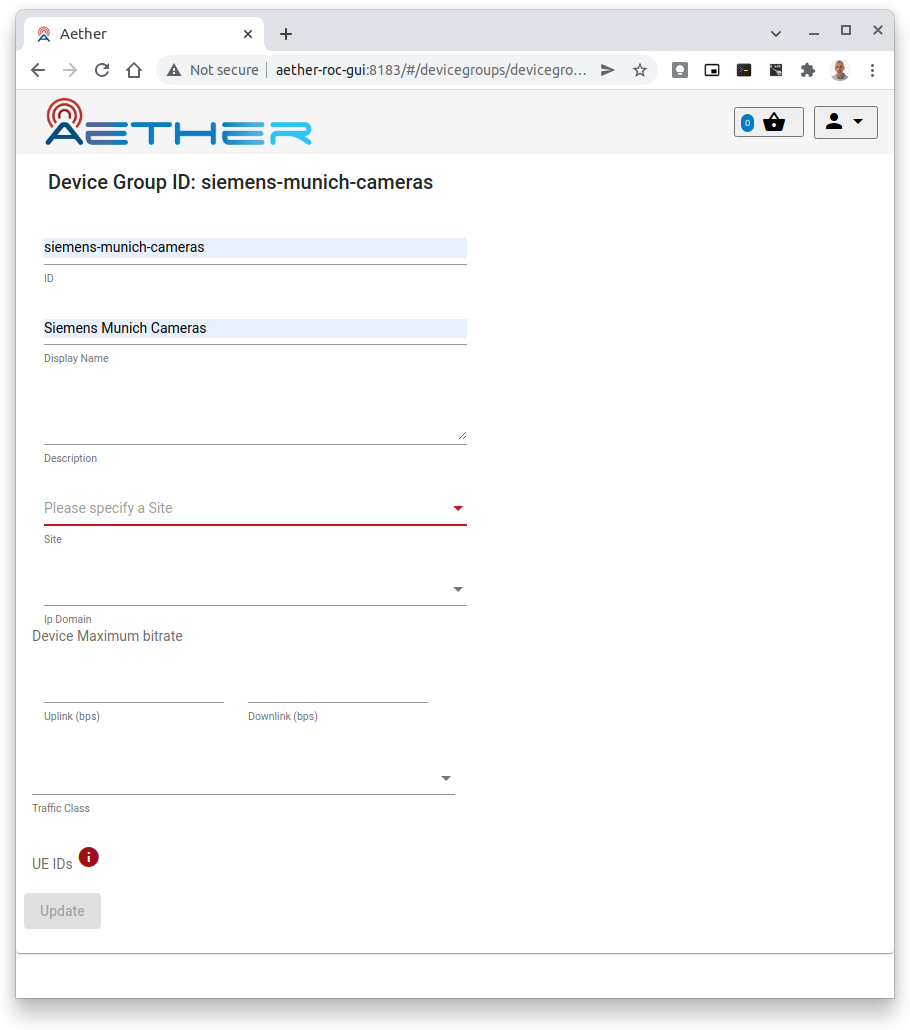
To add a DeviceGroup, navigate to the list of DeviceGroups and click Add in the upper right. (This may be grayed out if you do not have appropriate permissions).
- Specify a unique id for the DeviceGroup
40 characters max and only alphanumeric and -, _ and . allowed
- Choose an Enterprise and Site from the preconfigured list
It will not be possible to add Devices until the Site is chosen
Devices can be added at this stage or later
As part of the DeviceGroup, you may select a maximum bitrate (MBR) that will be used for the devices in the group. This bitrate is applied separately to each device within the group – it is not an aggregate of all devices within the group. For more information see the section on QoS Metering.
Delete a DeviceGroup
If a DeviceGroup is no longer needed, it can be deleted. Deleting a DeviceGroup will not cause the Devices participating in the group to automatically be moved elsewhere.
Note
If a Device Group is being used by an existing Slice, then it cannot be removed. Delete the Slice first, and then the DeviceGroup.
A DeviceGroup can be deleted from the DeviceGroup list view, by clicking the trash can icon next to it. The deletion is added to the Basket directly. Navigate to the Basket View to commit the change.
Add a DeviceGroup to a Slice
In order to participate in the connectivity service, a DeviceGroup must be associated with a Slice.
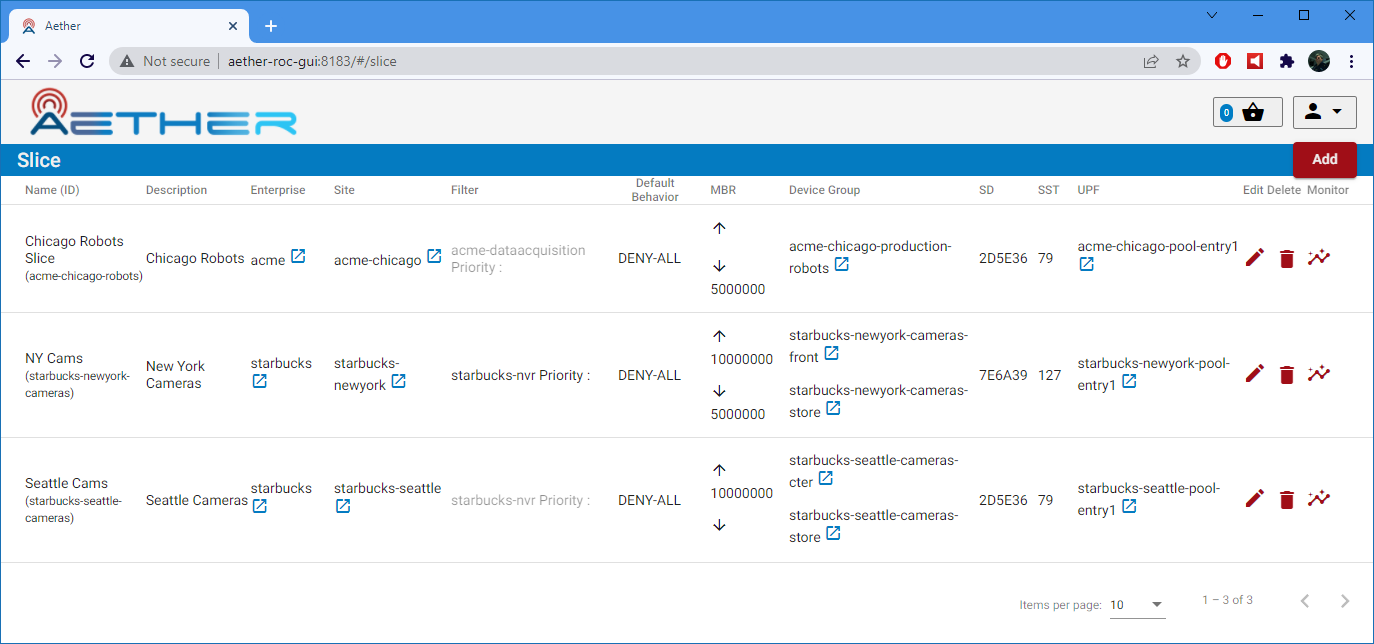
Navigate to the Slice list view to see the list of Slice’s and their associations to DeviceGroups.
To edit a Slice click on the edit button next to it in this list.
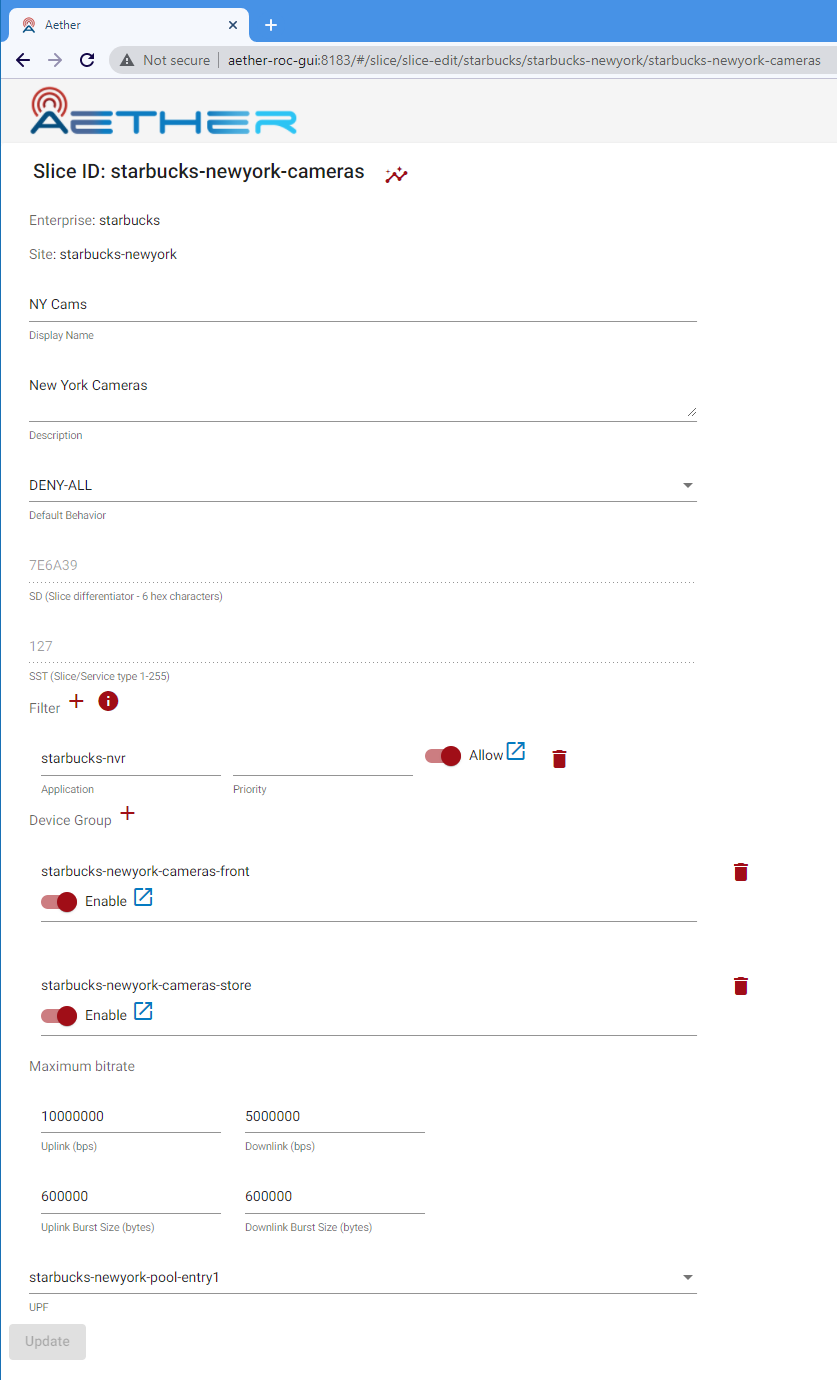
This brings up the Slice edit page where (among many other things) zero, one or many DeviceGroups can be associated with it.
Click the trash can symbol to remove a DeviceGroup from the Slice
Click the + icon to add a DeviceGroup
- Click the Enable slider to Enable or Disable the DeviceGroup
This is a way of disabling or reenabling the DeviceGroup within a Slice without having to remove it
Remove a DeviceGroup from a Slice
The procedure is covered in the above section.

