Subscriber and Connectivity Management
Subscriber management includes workflows associated with provisioning new subscribers, removing existing subscribers, and associating subscribers with virtual connectivity services.
Note
This section refers to a fully installed ROC GUI, properly secured and with Enterprises, Connectivity Services and Sites already configured by a ROC Administrator. The examples shown below are taken from an example configuration shipped with the ROC - the “MEGA Patch” (see Posting the mega-patch)
Provisioning a new UE
Before a UE can be granted connectivity service, it must first be provisioned. This step is normally performed by Aether Operations.
Each UE is assigned a PLMN and a set of security keys. Depending on the deployment scenario, these
keys might be shared by several UEs, or they might be unique to each UE. The allocation of PLMNs and
keys is currently performed manually by the Aether Operations team. This subscriber-related
detail is configured via the SIM Management application, simapp.
simapp.yaml needs to be adjusted to include the new UE IMSIs to the subscriber list. For example:
# simapp.yaml
# ...
simapp.yaml:
    info:
      version: 1.0.0
      description: SIMAPP initial local configuration
    logger:
      # network function
      APP:
        debugLevel: info
        ReportCaller: false
    configuration:
      provision-network-slice: false
      subscribers:
      - ueId-start: 123456789123458
        ueId-end: 123456789123458
        plmnId: 20893
        opc: 8e27b6af0e692e750f32667a3b14605d
        key: 8baf473f2f8fd09487cccbd7097c6862
        sequenceNumber: 16f3b3f70fc2
      - ueId-start: 123456789123460
        ueId-end: 123456789123465
        plmnId: 20893
        opc: 8e27b6af0e692e750f32667a3b14605d
        key: 8baf473f2f8fd09487cccbd7097c6862
        sequenceNumber: 16f3b3f70fc2
The simapp configurations for all deployments are stored in the aether-app-configs repository:
Production deployment:
apps/sd-core-4g/overlays/prd-acc-gcp1/values.yamlStaging deployment:
apps/sd-core-4g/overlays/stg-acc-aws/values.yaml
Fleet will automatically deploy changes to these files once they are merged.
Configure Connectivity Service for a new UE
To receive connectivity service, a UE must be added to a DeviceGroup. An Enterprise is typically organized into one or more Sites, each Site which may contain one or more DeviceGroups. Navigate to the appropriate DeviceGroup which is associated with the Site you wish to deploy on, and add the UE’s IMSI to the DeviceGroup.
The Site details can be seen by navigating to the Site list view.

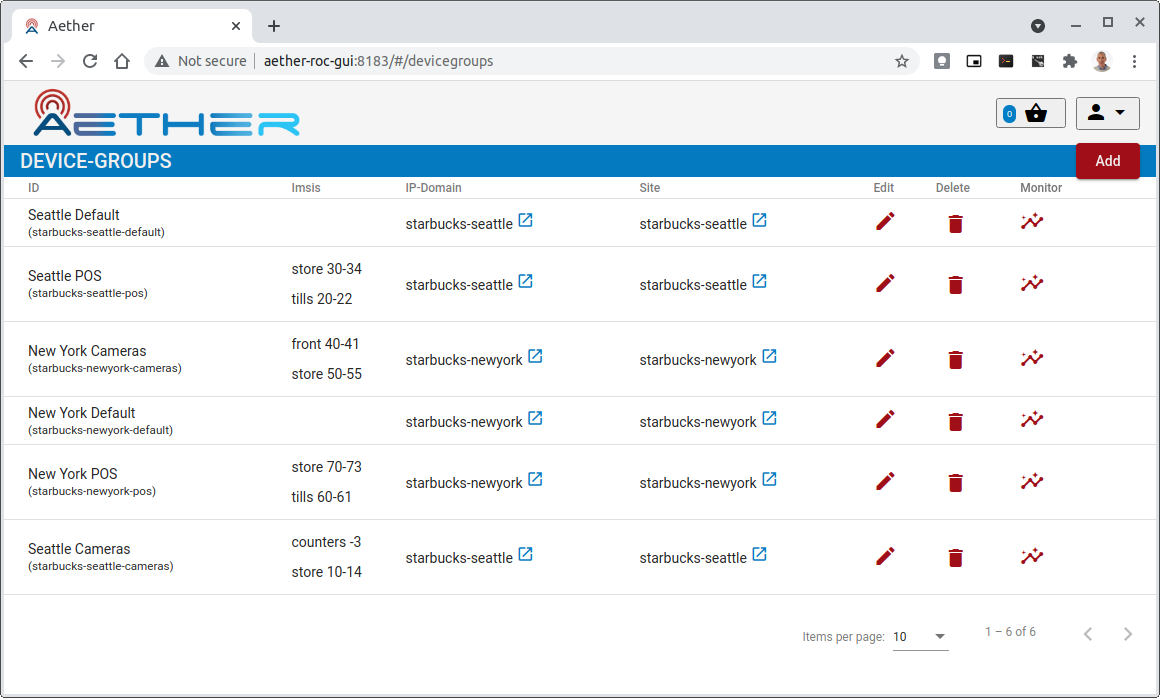
In the ROC GUI, navigate to the Device Groups list view, to see the list of Device Groups and their association to Sites.
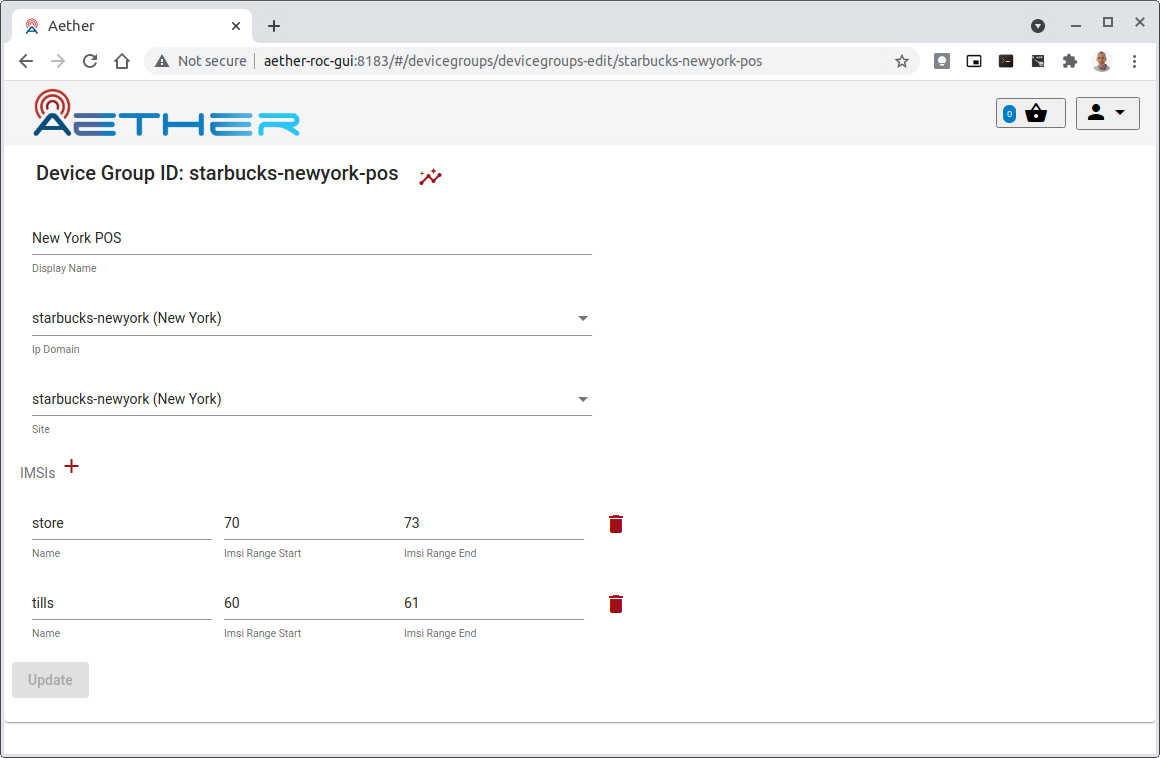
In the DeviceGroup New York POS example above an IMSI Range store of 70-73 will mean the set of IMSI IDs (when the format specifier of the starbucks-newyork Site are applied to its MCC, MNC and Enterprise) of
021032002000070 (021-032-002-000070)
021032002000071
021032002000072
021032002000073
Note
For 4G service, a UE may participate in at most one DeviceGroup, and that DeviceGroup may participate in at most one VCS. For 5G service, a UE can participate in many DeviceGroups, and each DeviceGroup may participate in many VCSes.
Editing
Edit the DeviceGroup by clicking on the Edit icon, and in the Edit page, adjust an existing range or create a new range (by clicking on the + icon).
The following restrictions apply
The IMSI ID specified in “from” or “to” is relative to MCC, MNC and Enterprise of the Site.
The maximum value of an IMSI ID is defined by the number of S characters in the format specifier of the Site.
IMSI Ranges are contiguous ranges of IMSI IDs. To accommodate non contiguous IMSI IDs, add extra Ranges.
IMSI Ranges can have a maximum span of 100 between “from” and “to” IMSI IDs. Break bigger spans in to many ranges.
IMSI ranges within a DeviceGroup cannot not overlap.
When the entries on the DeviceGroup edit page are valid the Update will become available
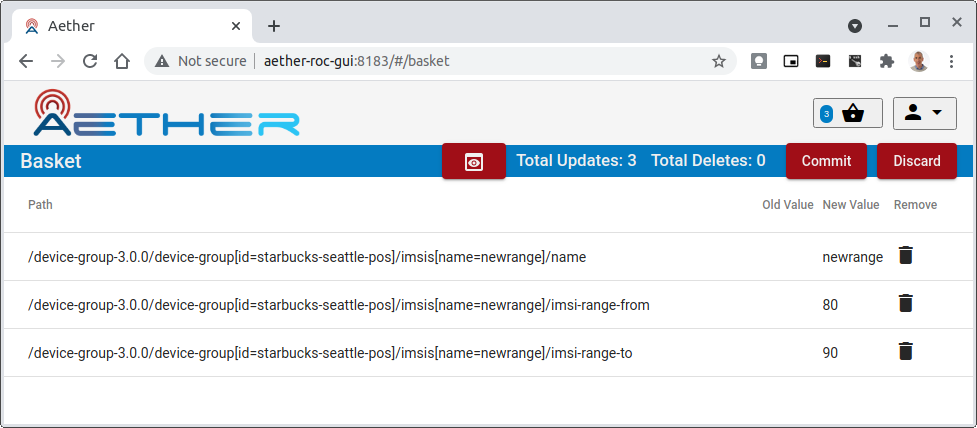
Click this to add the changes to the Basket of configuration changes
Observe that the Basket icon (2nd icon from top right) displays the number of changes
Note
The changes are not committed to aether-config until the Basket is committed. This allows several changes to be gathered together in one transaction and checked before committing.
Committing
To commit the changes
click on the Basket icon (2nd icon from top right) to see the Basket view
inspect the changes to be committed (optional)
click commit to perform the commit
observe the response that’s temporarily displayed that shows the success or failure of the commit
Remove Connectivity Service from an existing UE
Using the ROC GUI, navigate to the DeviceGroup that contains the UE, then remove that UE’s IMSI from the list. If you are removing a single UE, and the DeviceGroup is configured with a range specifier that includes several IMSIs, then it might be necessary to split that range into multiple ranges.
- If the UE to be removed has an IMSI ID in the middle of an existing IMSI Range:
click the trash can icon next to that IMSI Range and use the + icon to add new Ranges for the remaining IMSI IDs.
Note
The UE may continue to have connectivity until its next detach/attach cycle.
Create a new DeviceGroup
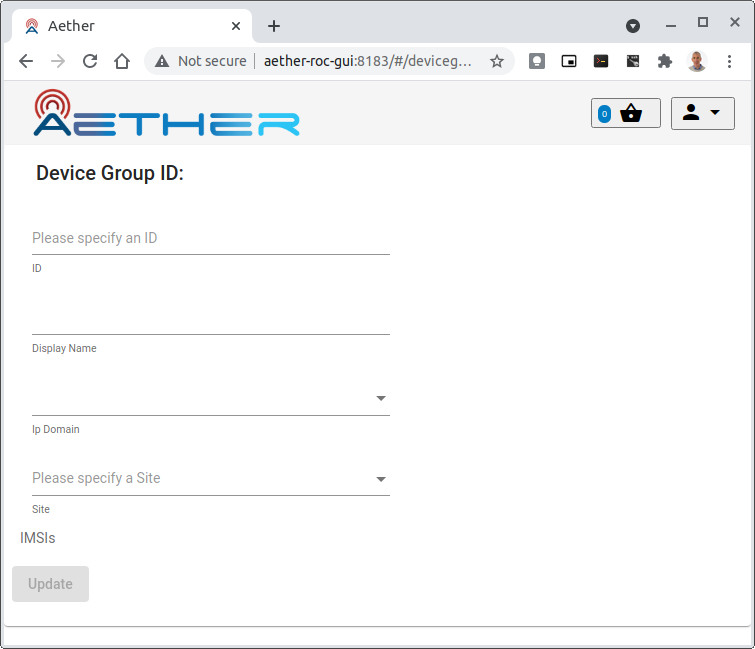
DeviceGroups allow UEs to be grouped and configured together. Each site comes preconfigured with a default DeviceGroup, but additional DeviceGroups may be created. For example, placing all IP Cameras in an my-site-ip-cameras DeviceGroup would allow you to group IP Cameras together.
To add a DeviceGroup, navigate to the list of DeviceGroups and click Add in the upper right. (This may be grayed out if you do not have appropriate permissions).
- Specify a unique id for the DeviceGroup
40 characters max and only alphanumeric and -, _ and . allowed
- Choose a Site from the list of preconfigured list
It will not be possible to add IMSI Ranges until the Site is chosen
IMSI Ranges can be added at this stage or later
Delete a DeviceGroup
If a DeviceGroup is no longer needed, it can be deleted. Deleting a DeviceGroup will not cause the UEs participating in the group to automatically be moved elsewhere.
Note
If a Device Group is being used by an existing VCS, then it cannot be removed. Delete the VCS first, and then the DeviceGroup.
A DeviceGroup can be deleted from the DeviceGroup list view, by clicking the trash can icon next to it. The deletion is added to the Basket directly. Navigate to the Basket View to commit the change.
Add a DeviceGroup to a Virtual Connectivity Service (VCS)
In order to participate in the connectivity service, a DeviceGroup must be associated with a Virtual Connectivity Service (VCS).
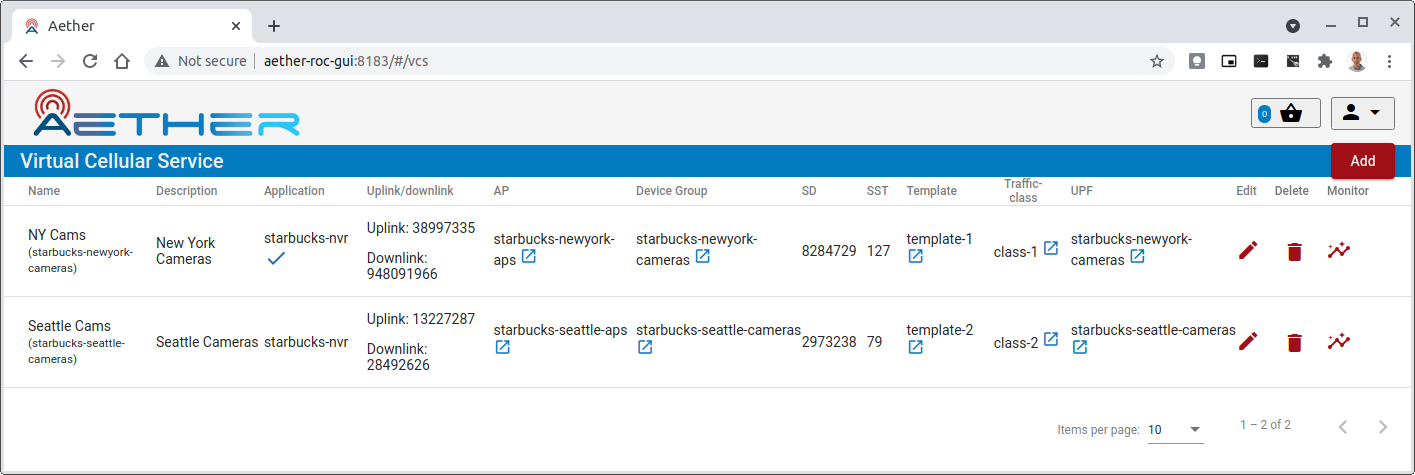
Navigate to the VCS list view to see the list of VCS’s and their associations to DeviceGroups.
To edit a VCS click on the edit button next to it in this list.
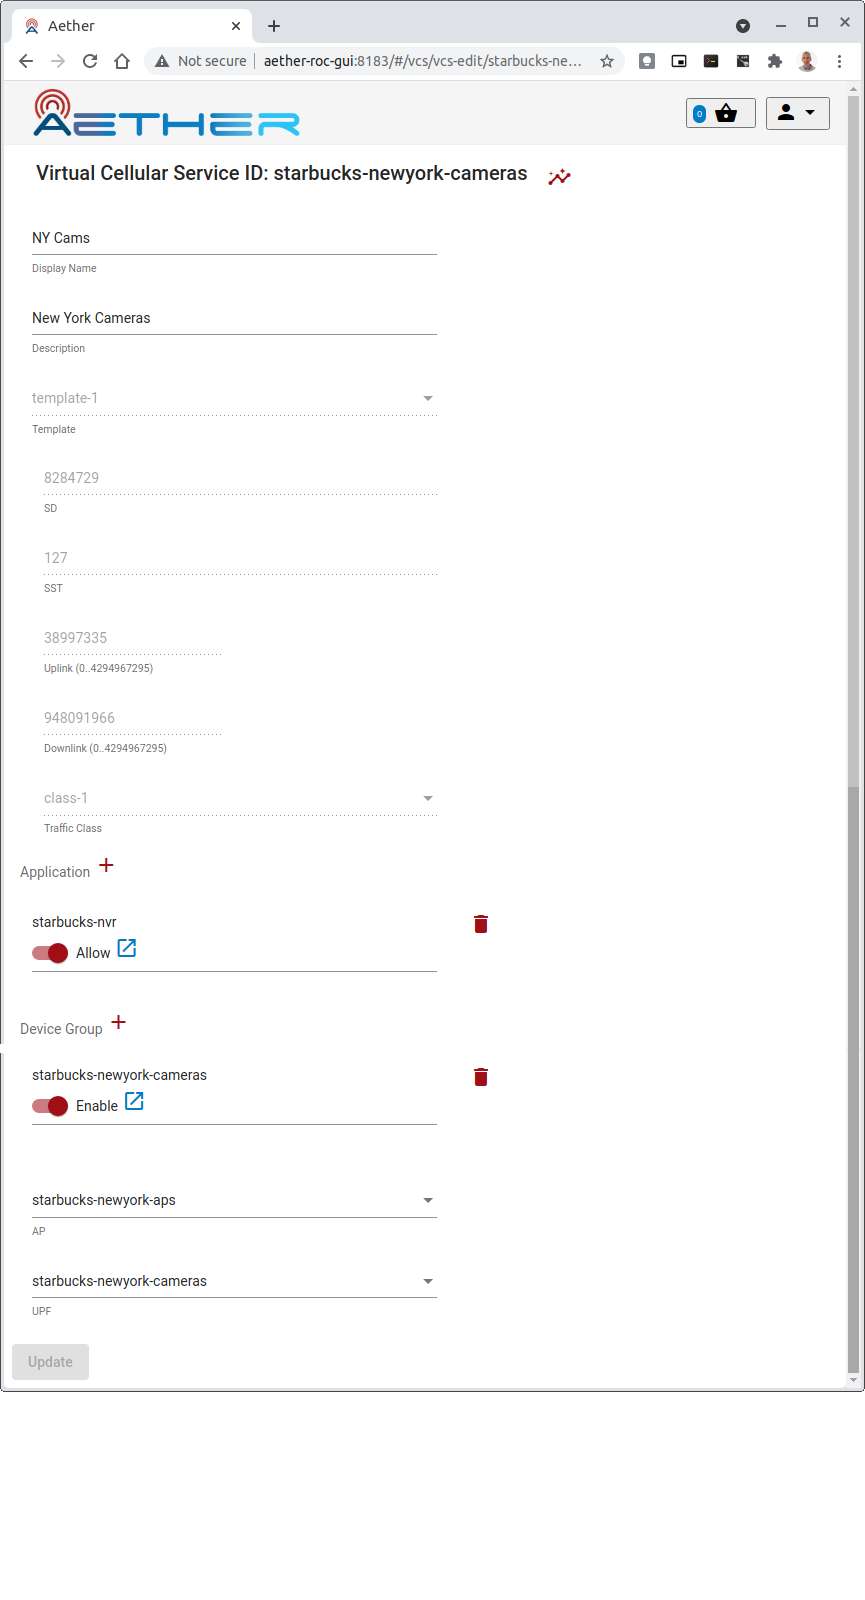
This brings up the VCS edit page where (among many other things) zero, one or many DeviceGroups can be associated with it.
Click the trash can symbol to remove a DeviceGroup from the VCS
Click the + icon to add a DeviceGroup
- Click the Allow slider to Allow or Disallow the DeviceGroup
This is a way of disabling or reenabling the DeviceGroup within a VCS without having to remove it
Remove a DeviceGroup from a Virtual Connectivity Service (VCS)
The procedure is covered in the above section.
Monitoring a DeviceGroup
The performance of a Device Group can be monitored in many ways, by clicking its ![]() (monitor) icon:
(monitor) icon:
From the VCS Monitor page, which shows all DeviceGroup’s belonging to an VCS.
From the DeviceGroup List Page - click the
 icon for the DeviceGroup.
When editing an existing DeviceGroup - in the Edit page, the
 is next to the id
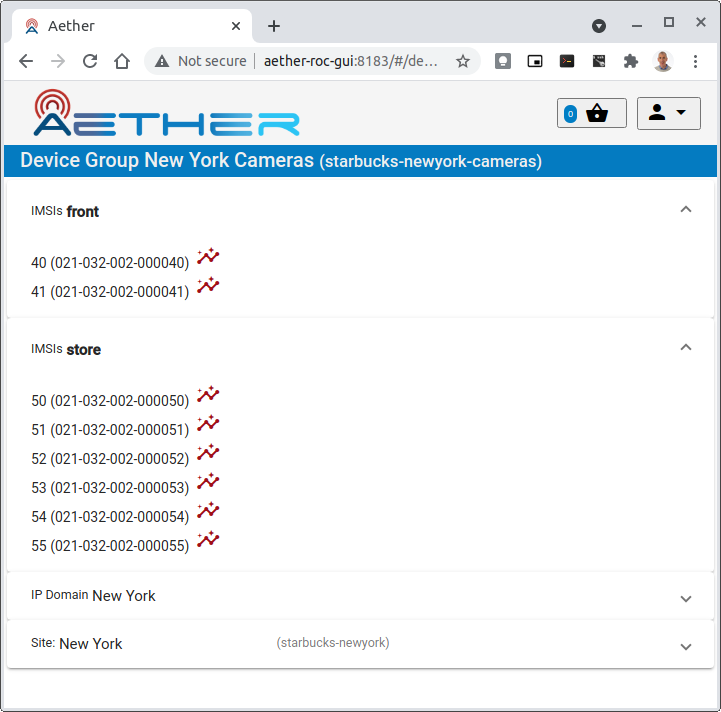
The monitor page itself shows:
An information Panel for each IMSI Range in the DeviceGroup
An information panel for the Site and IP Domain of the DeviceGroup
Clicking on the down arrow expands each panel
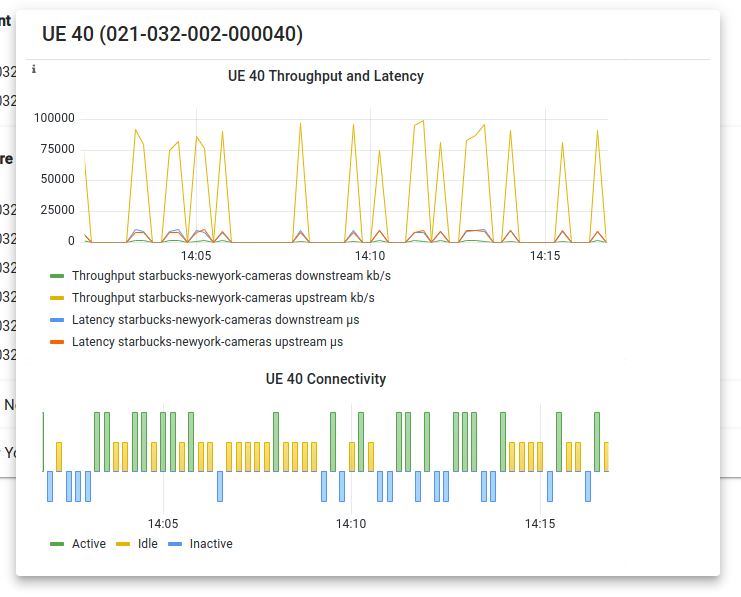
The per UE Monitor panel contains:
a graph of the UE’s Throughput and Latency over the last 15 minutes
a graph of the UE’s connectivity over the last 15 minutes
